This guide takes you from an empty account to a bookable event. There are two parts: publishing the event itself, then putting it in front of customers — either through the event’s own booking page, or through a schedule that shows your whole timetable.
Good to know
- Use a booking page when you’re promoting a single event — a workshop, a retreat, a one-off session.
- Use a schedule when you’re publishing multiple events — it’s an automated timetable of your entire event list that keeps itself up to date.
- Many businesses do both: a schedule embedded on their website, plus booking pages for anything they promote separately.
What is a booking page?
Every event you publish has its own booking page — the page where customers see the details, pick a date and pay. It comes in two forms, and you can use either (or both):
- Embed script — a small piece of code (sometimes called a widget) you paste into your own website, which places the booking page directly inside one of your pages.
- Hosted page — reservie gives you an exact link to a page we host on your behalf. Share the link anywhere: your website, an email, social media or WhatsApp.
Either way it is the same booking page; the only difference is whether it lives inside your website or on a link we host for you.
What is a schedule?
A schedule is an automated timetable of your entire event list. Instead of pointing customers at one event, it publishes everything that’s live — classes, courses and workshops — in a browsable timetable that customers can book from directly. When you publish a new event, it appears on the schedule automatically; when the last date passes, it drops off.
Like a booking page, a schedule can be embedded into your own website or shared as a reservie-hosted page link. You can also let customers buy passes, subscriptions and videos from it.
Step 1 — Publish your event
- Go to Services → Events in the sidebar and click Add Event.
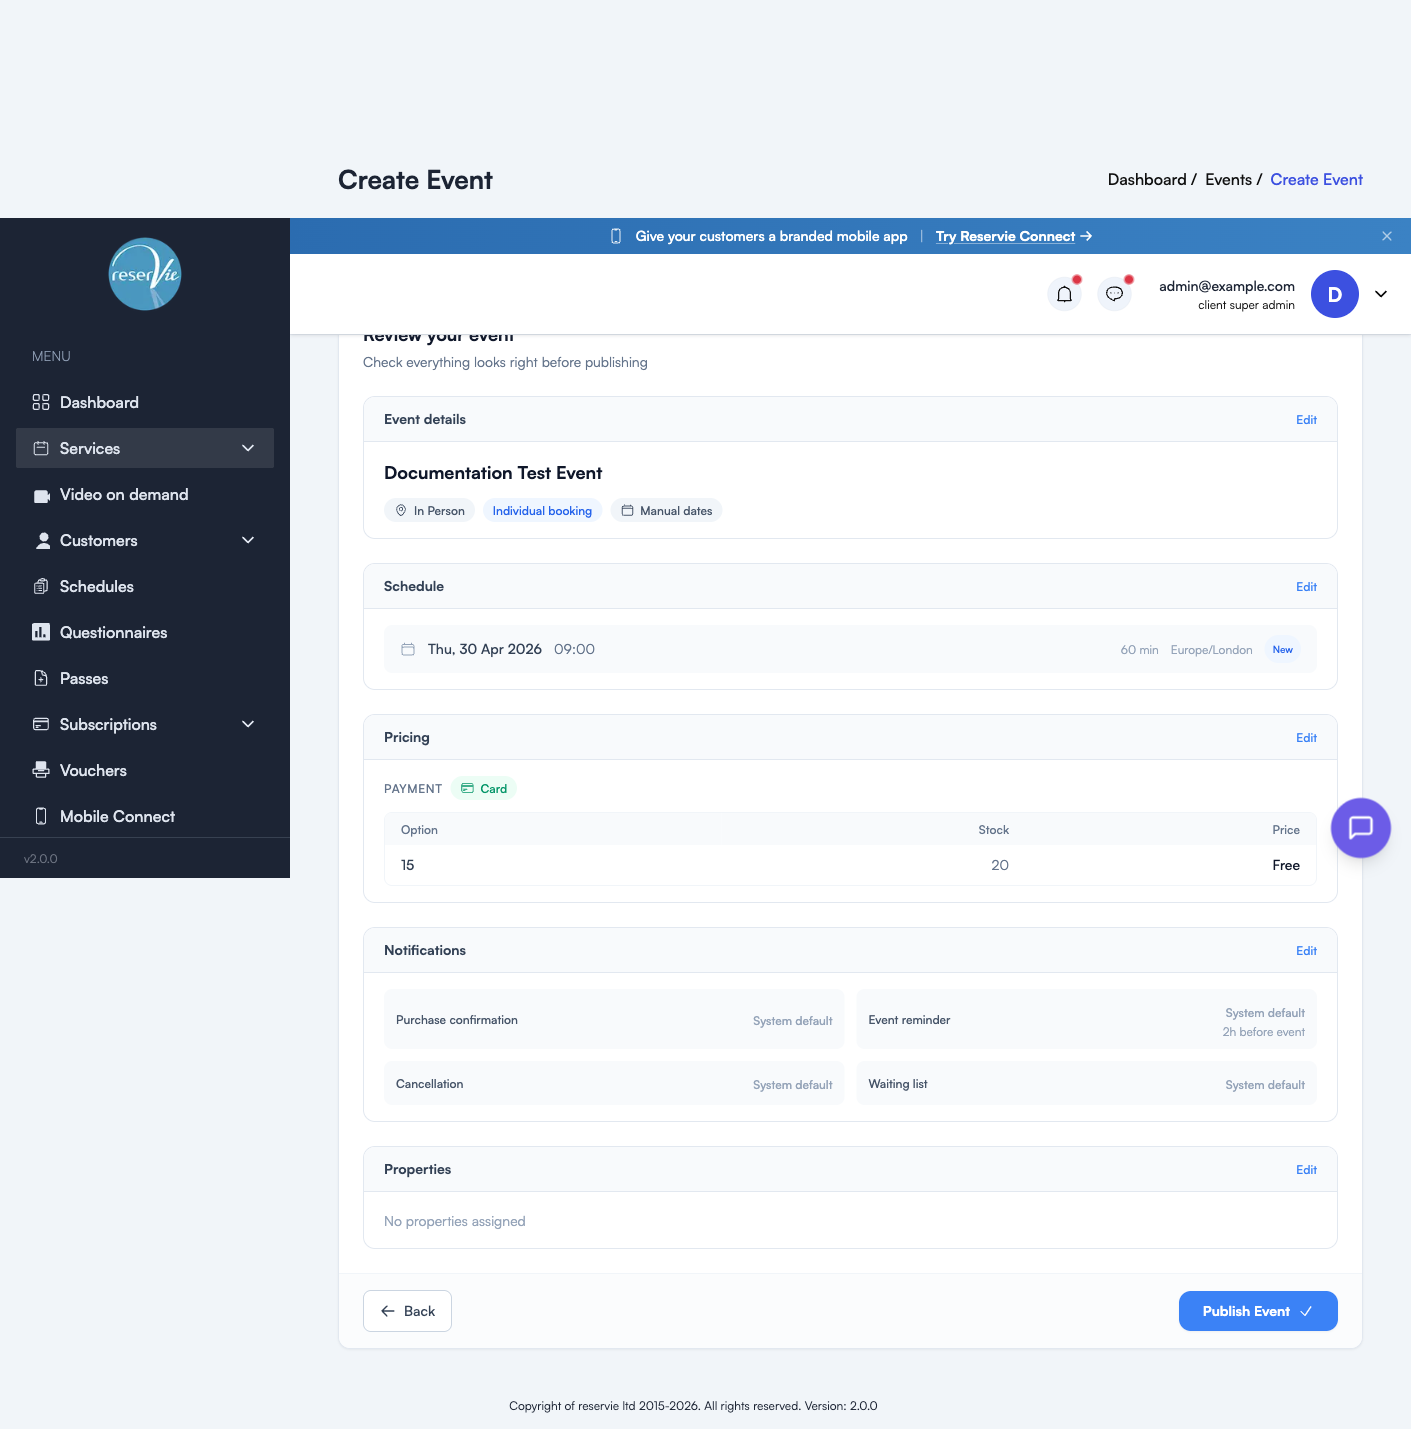
- Work through the four steps of the event editor: details (name, in person or virtual, booking style), dates, pricing, then review.
- Click Publish Event.
Your event is now live and bookable. For a full walkthrough of every option in the editor, see Creating and Editing Events.
Step 2 (option A) — Share the event’s booking page
- Go to Services → Events and make sure you’re on Event View.
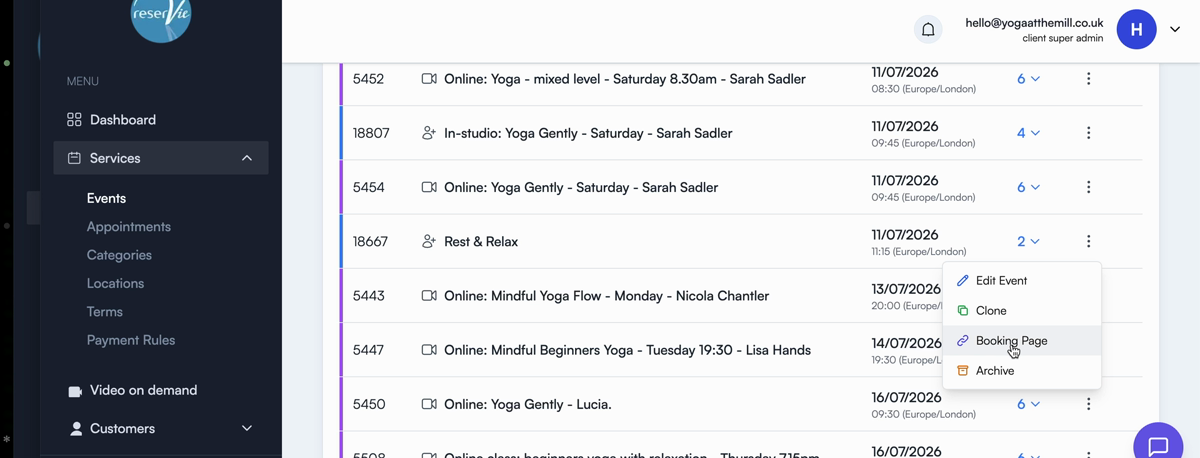
- Find your event and click its ⋮ action menu, then select Booking Page.
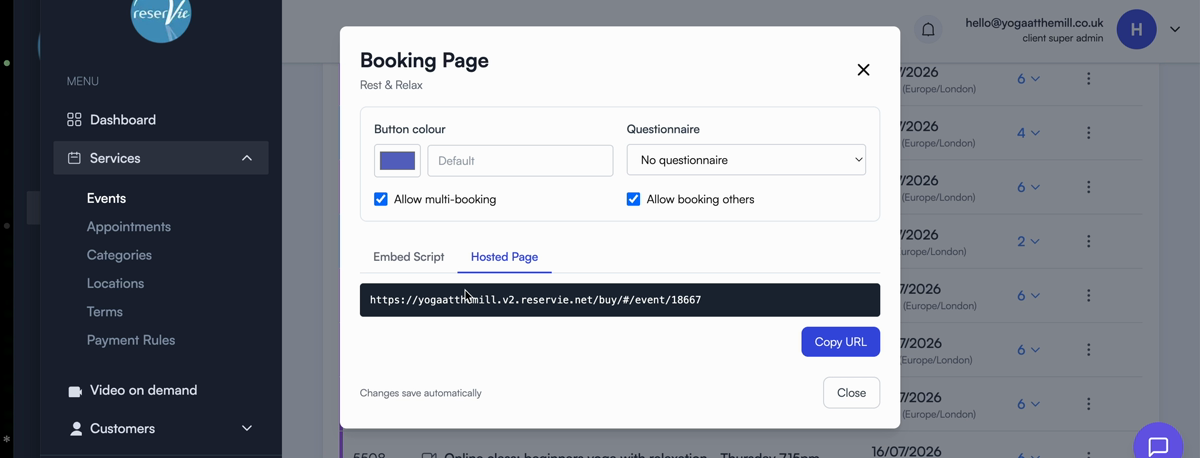
- A pop-up opens. Choose your button colour and, if you’d like customers to answer questions when they book, attach a questionnaire. Changes save automatically.
- The pop-up gives you two tabs: Embed Script — code to place the booking page inside your own website (click Copy snippet) — and Hosted Page — the exact link to the page we host for you (click Copy URL).
- Paste the script into a page on your website, or share the hosted link anywhere: email, social media or WhatsApp.
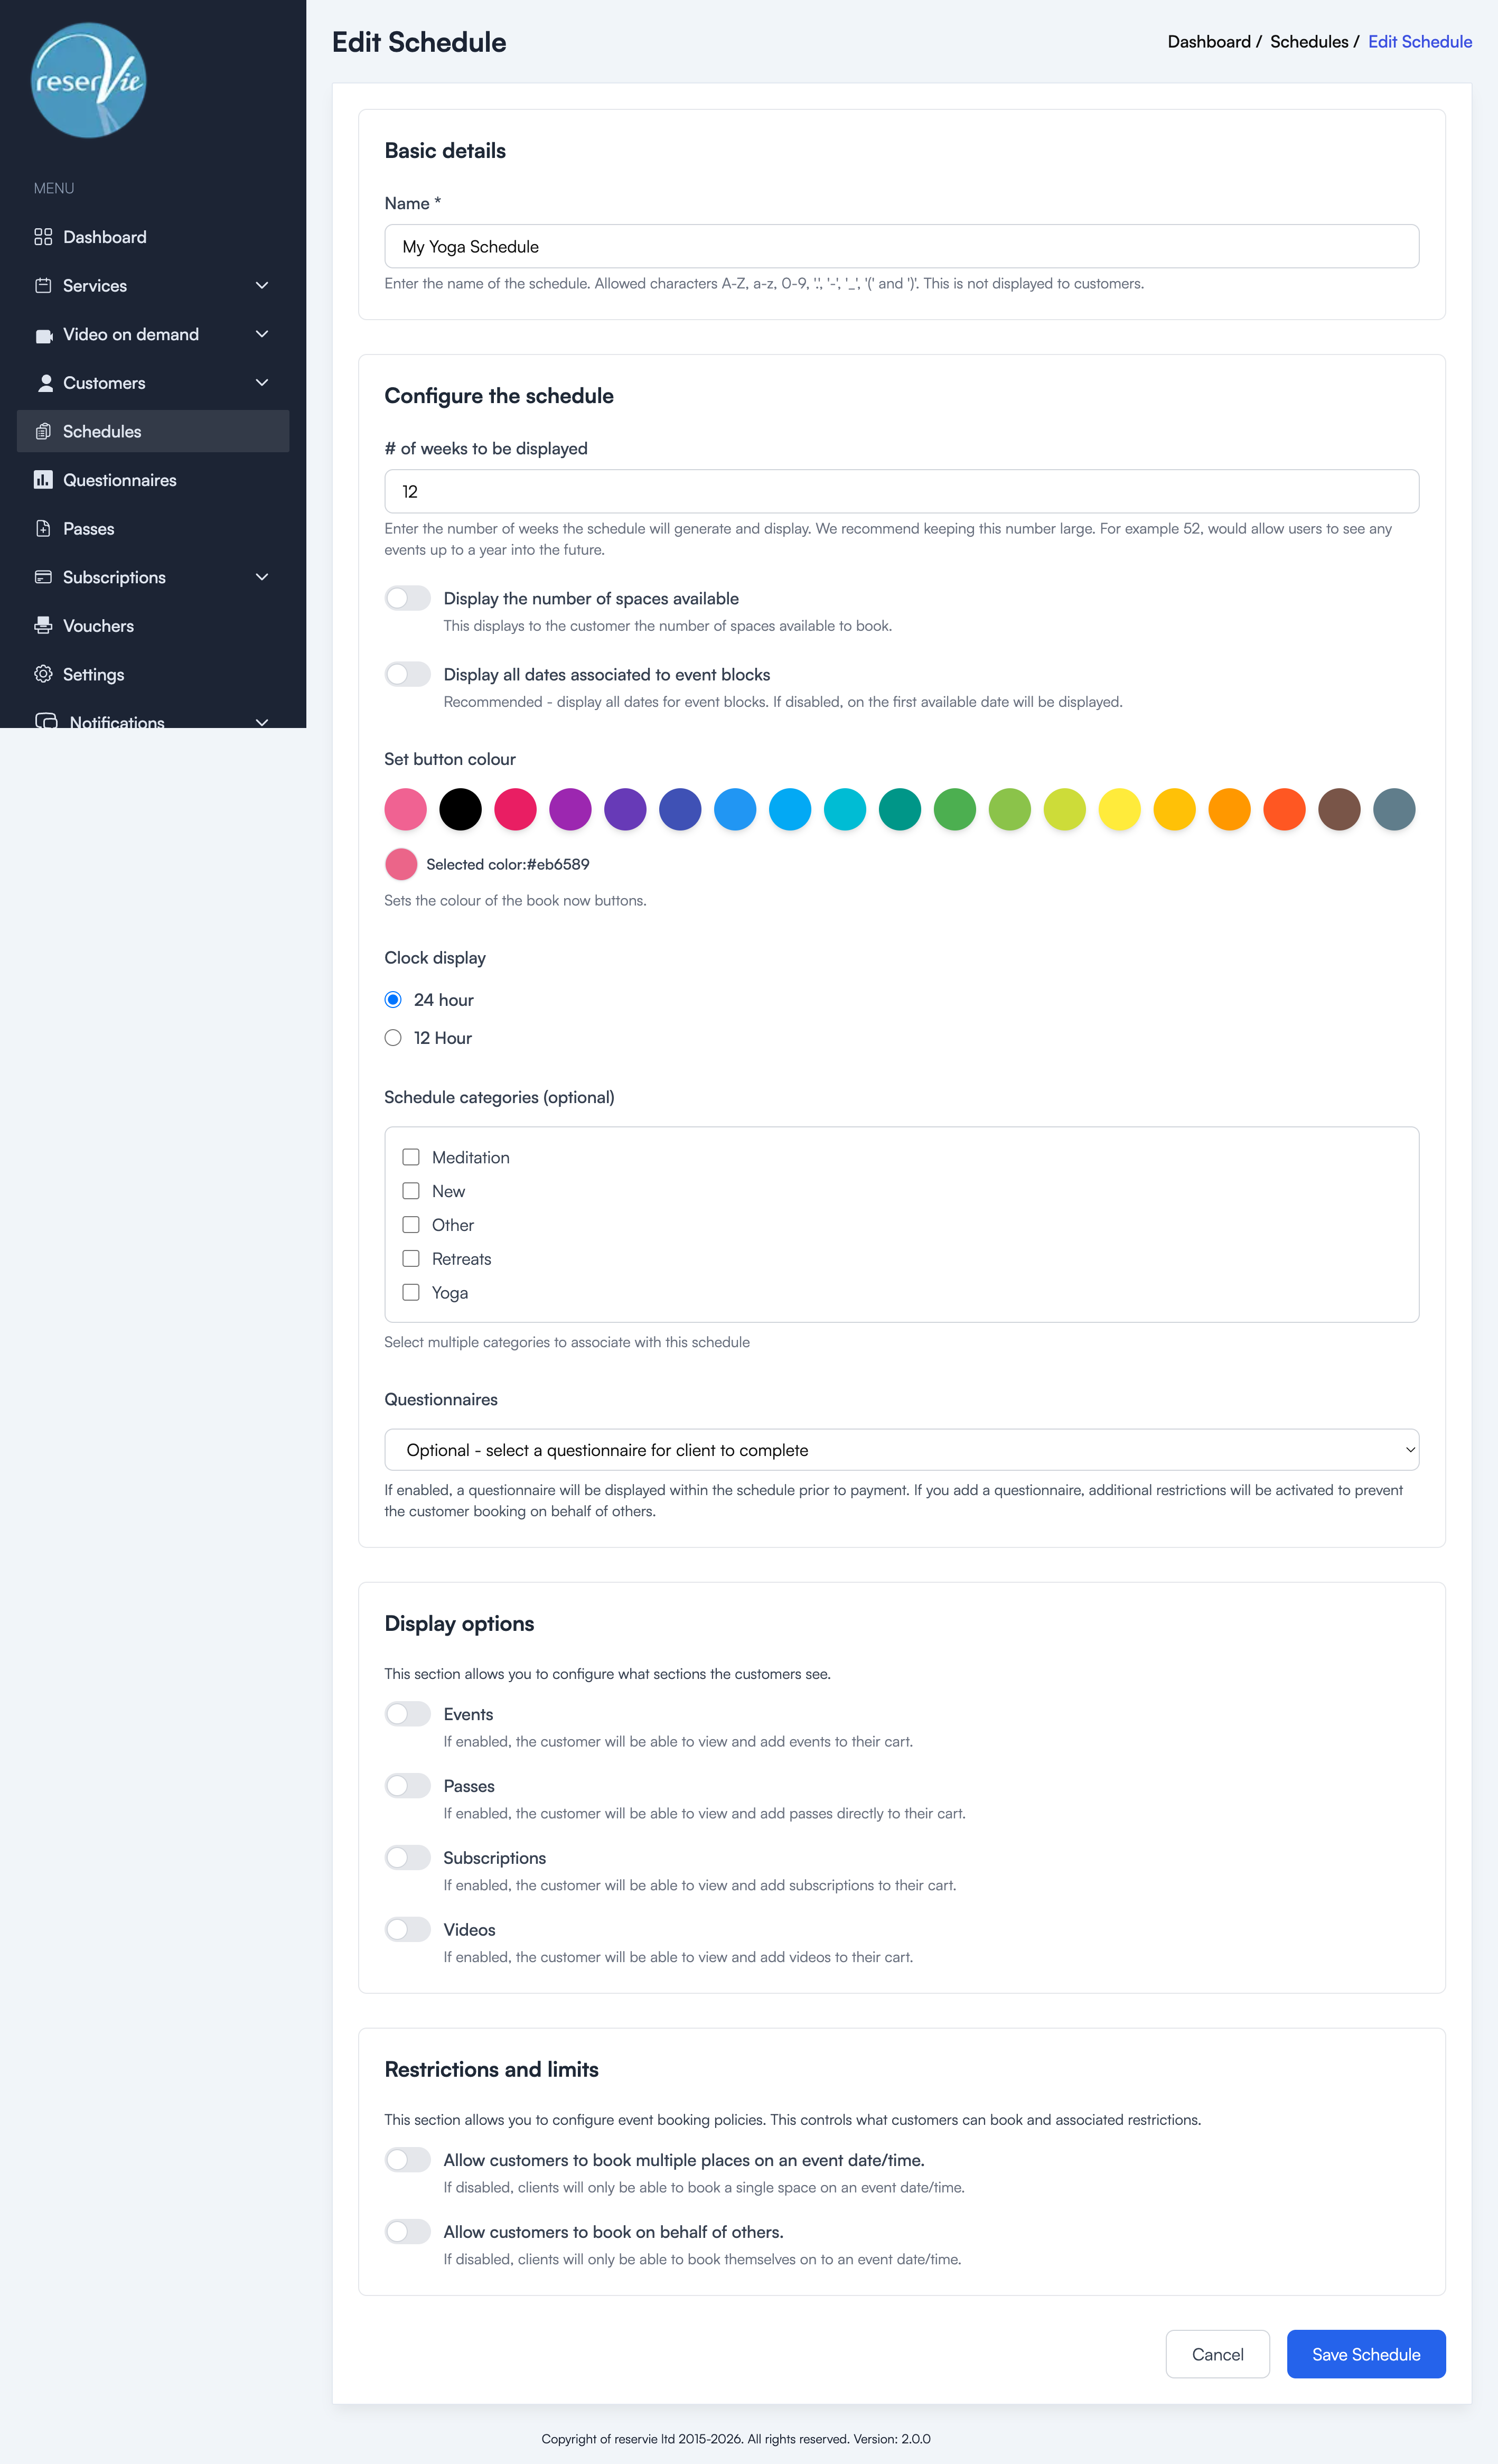
Step 2 (option B) — Create a schedule
- Go to Schedules in the sidebar and click + Create.
- Give the schedule a name (for your reference only) and choose how many weeks to display — 4 works well for most timetables.
- Click Save Schedule.
- From the Schedules page, copy the schedule’s hosted page link to share it, or its embed code to place the timetable in your own website.
Every live event appears on it automatically — including the one you just published. For all the configuration options (categories, colours, what customers can buy from it), see Getting Started with Schedules.
Next steps
- Connect Stripe so customers can pay online — see Accepting Payments Online
- Put your timetable on your own site — see Adding Reservie to Your Website
- Check bookings as they come in — see Managing Event Registrations