What it does
If you use Google Analytics or a Meta Pixel, your landing page can report to them. You can then see which posts, ads and campaigns bring you bookings, not just clicks. For example: your Instagram ad brought 40 visits and 6 bookings worth £72.
Your landing page sends three things:
- Visits to your landing page, and to the class, pass, event, gift voucher and video pages people reach from it.
- Checkout started, when someone opens checkout.
- Purchases, with the amount and currency actually paid. A booking paid entirely with credits counts as a purchase of 0.
In Google Analytics these show as the standard page_view, begin_checkout and purchase events. In Meta they show as PageView, InitiateCheckout and Purchase. You can use them for conversions and ad reporting straight away, with nothing else to set up.
Adding your IDs
Go to Settings → Checkout Settings and scroll to Tracking on your landing page.
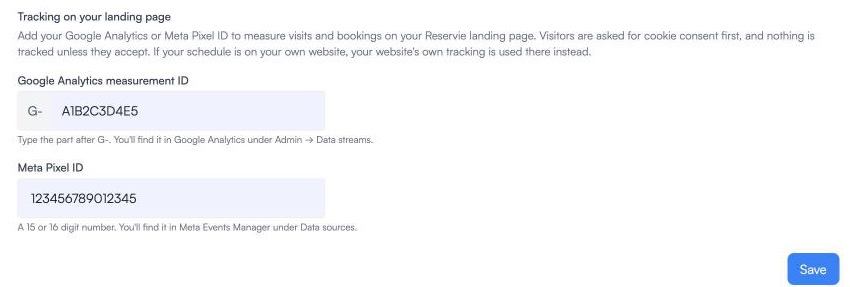
- Google Analytics measurement ID. The G- is already there. Type the rest, which is 6 to 12 letters and numbers. See Getting a Google Analytics measurement ID.
- Meta Pixel ID. A 15 or 16 digit number. See Getting a Meta Pixel ID.
Then press Save. You can add one, both or neither.
If an ID isn’t the right shape, a red message appears under the box, for example “That doesn’t look right. A Meta Pixel ID is 15 or 16 digits.”, and Save stays greyed out until it’s fixed.
To stop tracking, clear the box and save.
Your visitors are asked first
As soon as you add an ID, your landing page shows a cookie banner. It names your studio and the services you use, and links to your privacy policy.
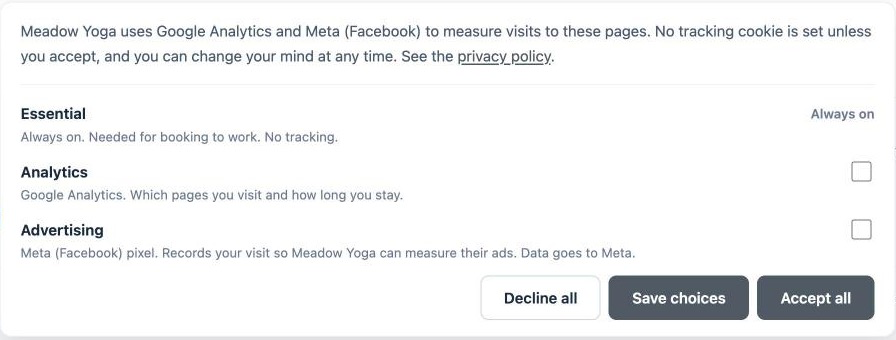
- Nothing is tracked until a visitor accepts. Until then, no Google or Meta code loads at all.
- Accept all and Decline all are the same size, and nothing is ticked in advance.
- Visitors can say yes to one and no to the other, then press Save choices. Analytics is Google Analytics, and Advertising is Meta.
- A Cookie settings link at the foot of your page lets them change their mind at any time.
- The choice counts for your page only. Accepting on another studio’s page doesn’t count for yours.
Studios without an ID don’t get a banner, and nothing changes for them.
The banner is how your page meets the cookie rules (UK GDPR and PECR, and the EU equivalents), so you don’t need to set one up yourself.
Expect Google Analytics to show fewer visits than you really had, because some people decline. That’s normal.
What you’re responsible for
- The data in your Google Analytics or Meta account is yours. You are responsible for it, and reservie doesn’t see it.
- Mention Google Analytics and/or Meta in your privacy policy. The banner links to your privacy policy when you have one (see Terms and privacy policy).
If your schedule is on your own website
This setting is for your reservie landing page. When your schedule is on your own website, your website’s own tracking is used there instead.
- If your website already has Google Analytics, Google Tag Manager or a Meta Pixel, the schedule sends checkout started and purchases into it automatically.
- Visits are counted by your website’s tracking, as usual.
- Your website’s own cookie banner decides whether visitors are tracked, not ours.
- If your website has no tracking, nothing is sent.
So you don’t need to enter your IDs in reservie for your own website. You can still add them for your landing page.
What isn’t supported
- Google Tag Manager, or your own scripts, on the landing page. For security, we don’t run studios’ own code on the landing page. Schedules on your own website do work with Tag Manager.
- Google Ads conversion tags (the ones starting AW-). Link your Google Analytics property to Google Ads instead, and import the
purchaseconversion from there. Google recommends doing it this way. The steps are at the end of Getting a Google Analytics measurement ID.